Back with another tutorial/demo video! In this video I take you through the relatively simple process I used to edit this photo entitled "Under Guiding Lights."
For more tutorials, click here!
Tutorials
Back with another tutorial/demo video! In this video I take you through the relatively simple process I used to edit this photo entitled "Under Guiding Lights."
For more tutorials, click here!
Just back from Batanes as part of a large group of bloggers and other media people who were there to try out the photography features of the Asus Zenfone 3 line of mobile phones, courtesy of Asus Philippines. I was there mainly as a resource person on shooting the Milky Way, and I was intrigued about the possibility of pulling off Milky Way shots using a mobile phone. How did it turn out? Find out by watching the video above and seeing the final images below!
One of the headline features of the Asus Zenfone 3's camera is its built-in manual mode that allows you to go all the way to ISO 3200 and do long exposures of up to 32 seconds. (For comparison, using the $3.99 645 Pro app on my iPhone 6, I get up to ISO 2000 and a 1/2 second exposure at most, on f2.2.) Combined with its large aperture f/2.0 Largan lens, this would theoretically add up to the standard exposure settings for a wide angle Milky Way shot. For this post, I'm focusing exclusively on shooting the night sky and the Milky Way, saving my overall thoughts on the photography and video features of the Zenfone 3 for a post in the coming week.
Read More2:00 in the morning and perfect night sky conditions at Saddle Camp on Mt. Pulag. Click to enlarge. Sony A7RII + Samyang 14mm f2.8 | 20s | ISO 6400.
This post has been a long time coming: a showcase of the incredible night skies I experienced back in April 2016 on the Akiki Trail of Mt. Pulag. The quantity and quality of images I shot on that one trip was easily worth 3-6 months of average shooting. On this post, I take you through my best shots of the trip and the process of shooting and post-processing them --- in effect, this is my first virtual night sky workshop!
And coolest of all: my first 180-degree VR panorama of the Milky Way!
The trek on the Akiki Trail --- known as the "Killer Trail" for its seemingly never-ending steep ascents --- is worth a Photo Diary of its own, but for this post, I'll be focusing solely on the night sky shots.
Coming into the trip, I was optimistic and excited to shoot the night sky because the conditions were just right:
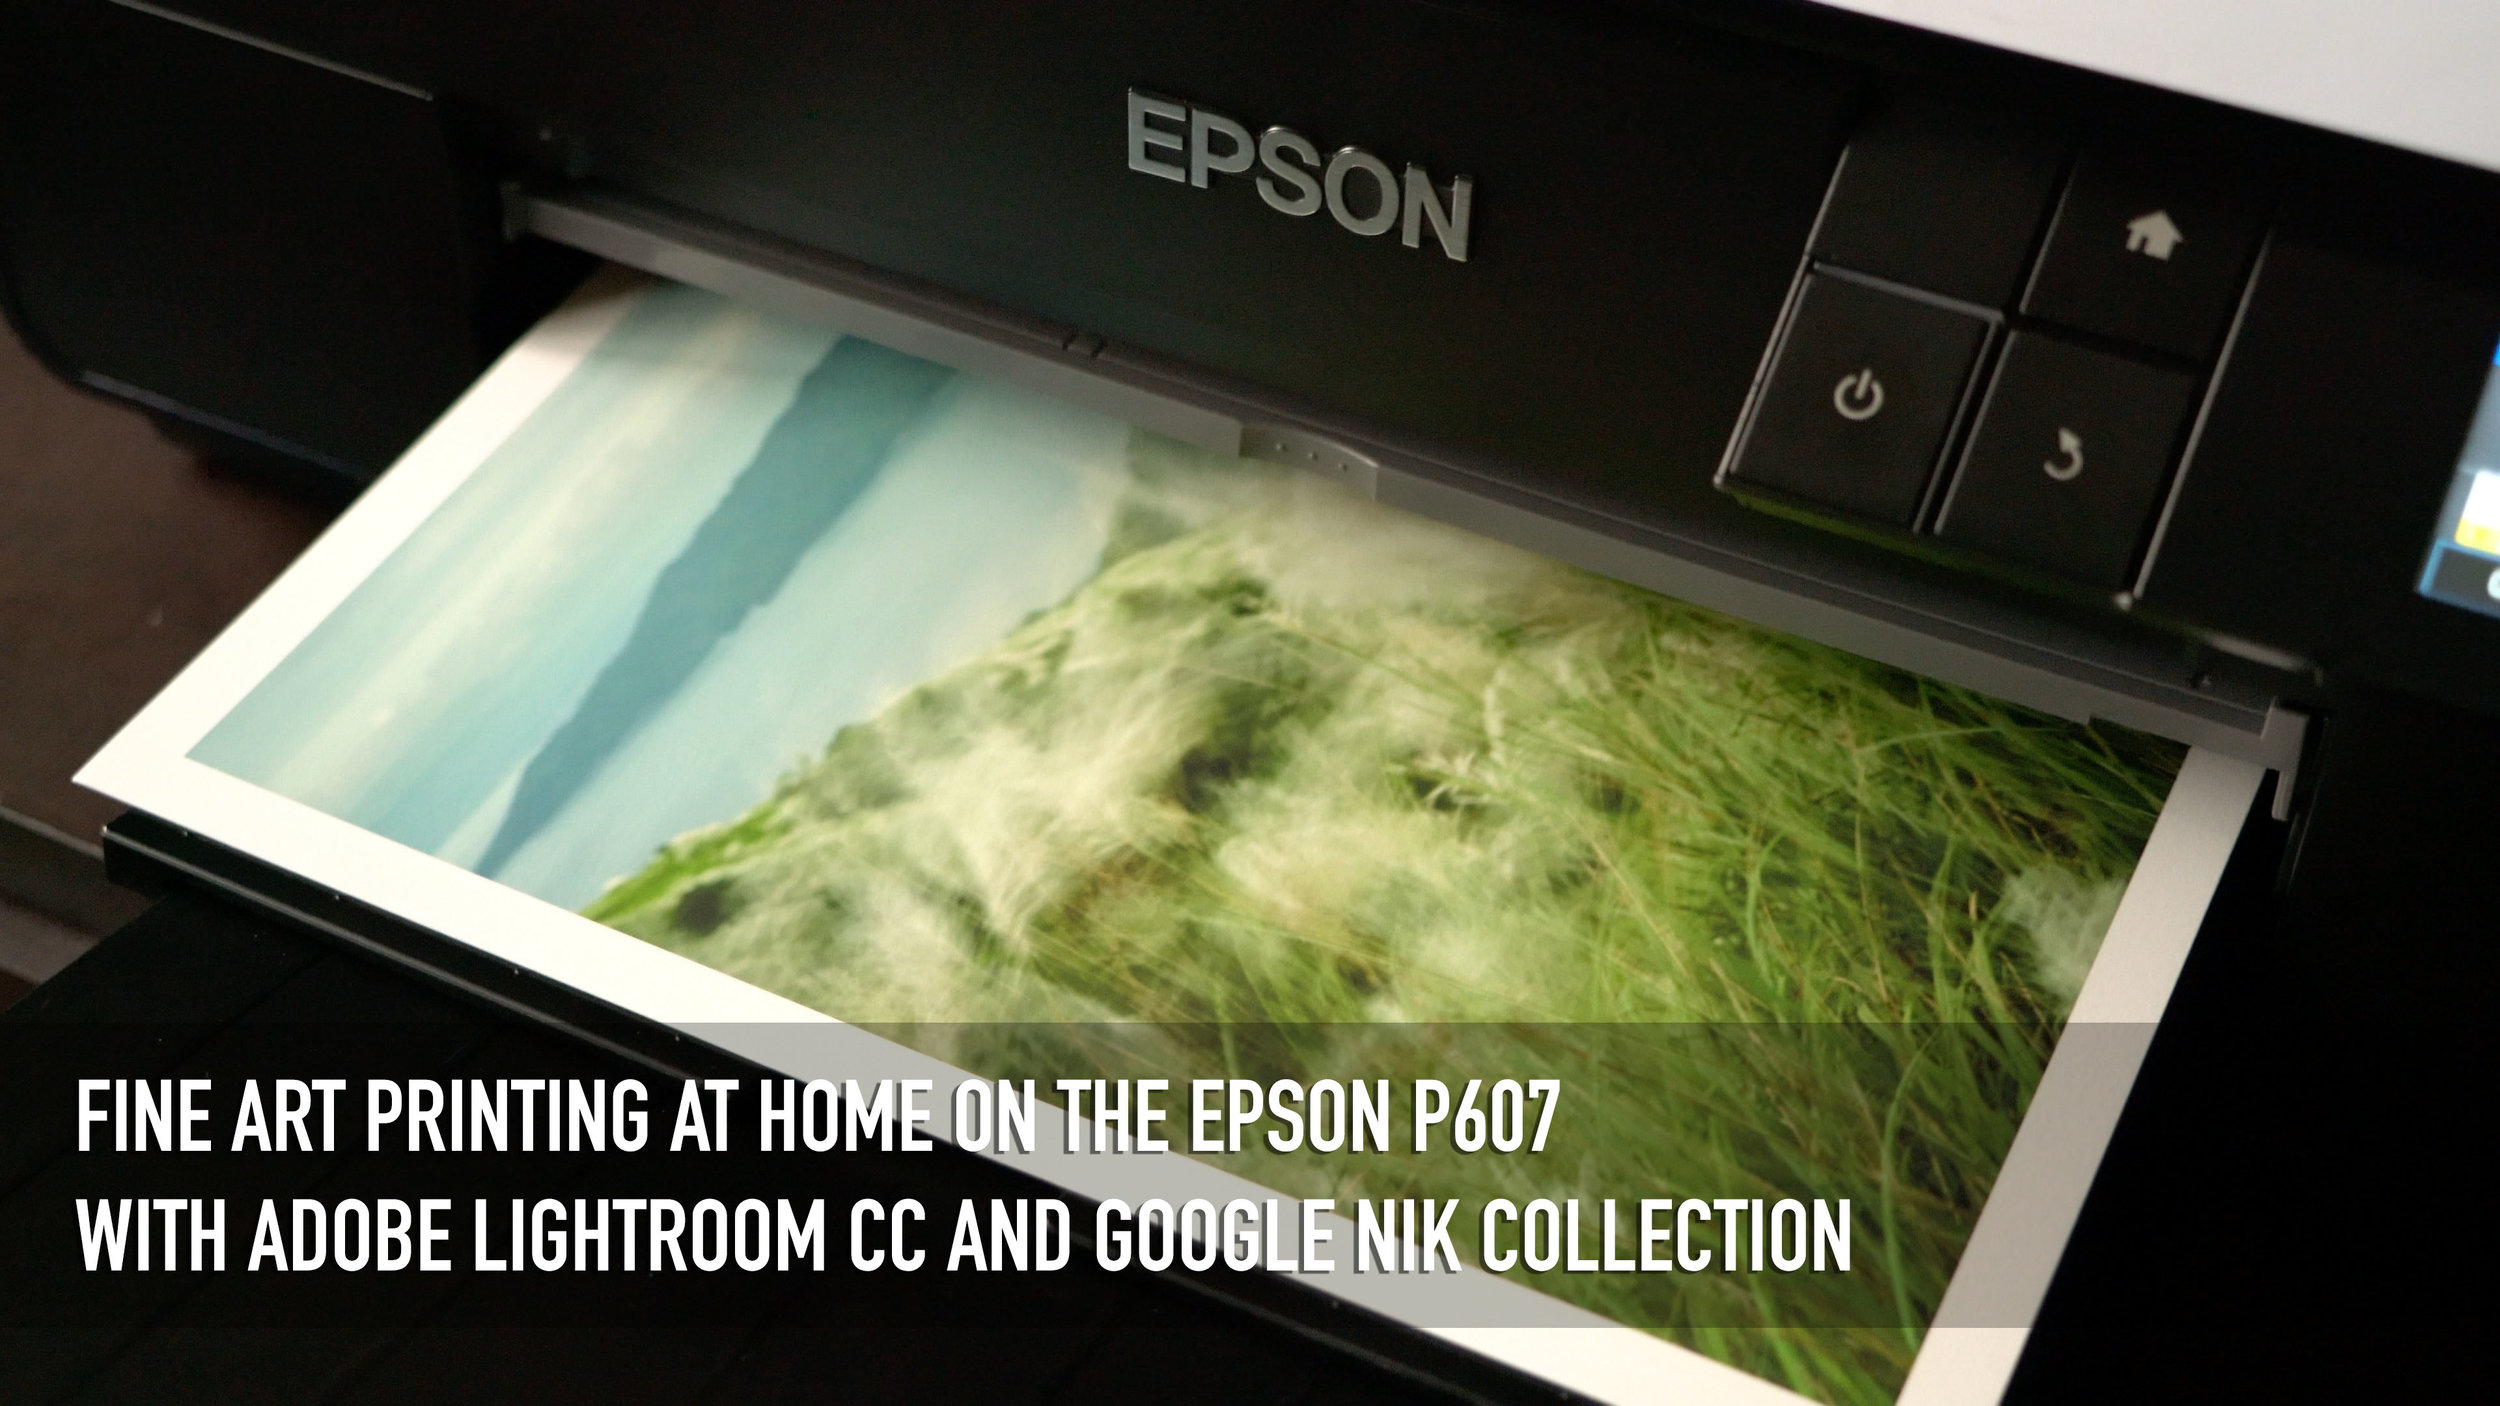
Finally got around to making a video on one of my favorite topics: printing! This is one of the most technical but also most rewarding aspects of photography, as many photographers insist that it's not a photograph until it's printed. This is quite a deep topic that I've spent many, many hours studying both online and under the guidance of my mentor, but I hope this demonstration both gives you a decent overview and whets your curiosity about all the work that goes into fine art printing.
Read MoreFollowing up on my previous guide to shooting the Milky Way, this quick and easy tutorial is meant to give beginners a solid starting point for editing Milky Way and night sky photos in Adobe Photoshop Lightroom. While it doesn't address the finer points of a perfect Milky Way edit, it will definitely give you a more visible and dramatic Milky Way galactic core and can save photos taken in less-than-ideal night sky conditions.
A summary of the basic workflow I followed in the video:
From here, you can proceed to perfecting the photo with localized edits, composites, dodging and burning, etc. Hope this helps! Til next time.